

Connect Shopify with Zapier
What this does
Connect your Shopify shop to your loyalty program with Zapier. Every paid order earns the buyer stamps or points, new buyers get their card by email, and a refund takes the points back. You build it once in Zapier and it runs on its own. You can also add your loyalty members to your Shopify customers (Step 5).
A Zap is one automation in Zapier. It starts with a trigger (something happens, like a new paid order) and then runs one or more actions (what Zapier does about it).
There is no Shopify app to install. Everything happens in Zapier, using the Passtastic app in Zapier and Shopify's own Zapier steps. The optional Step 5 uses your program's Zapier link instead. Zapier's field names can look slightly different from the ones below; pick the closest match.
The Zapier connection is part of the Connect your POS pack. It is on during your 14-day free trial and is priced per location; see Pricing. If you remove the pack, the connection pauses and nothing is deleted. On an earlier plan? Your plan keeps what it included; see Understanding plan limits.
Before you start
- A published stamp, points or level program in Passtastic. If you don't have one yet, create it from Programs → New program. (Coupon, membership and prepaid programs don't earn from orders.)
- The Connect your POS pack (on during your trial).
- A Zapier account on a paid plan: Zapier marks Shopify as a Premium app. See Zapier's pricing page.
- A Passtastic API key (see Step 2).
Step 1: Get the Passtastic app in Zapier
The Passtastic app in Zapier is invite-only for now.
1. Click the chat bubble at the bottom right of your Passtastic dashboard and ask for the Zapier invite link.
2. Open the link. It opens in Zapier, where you click Accept.
Step 2: Create an API key
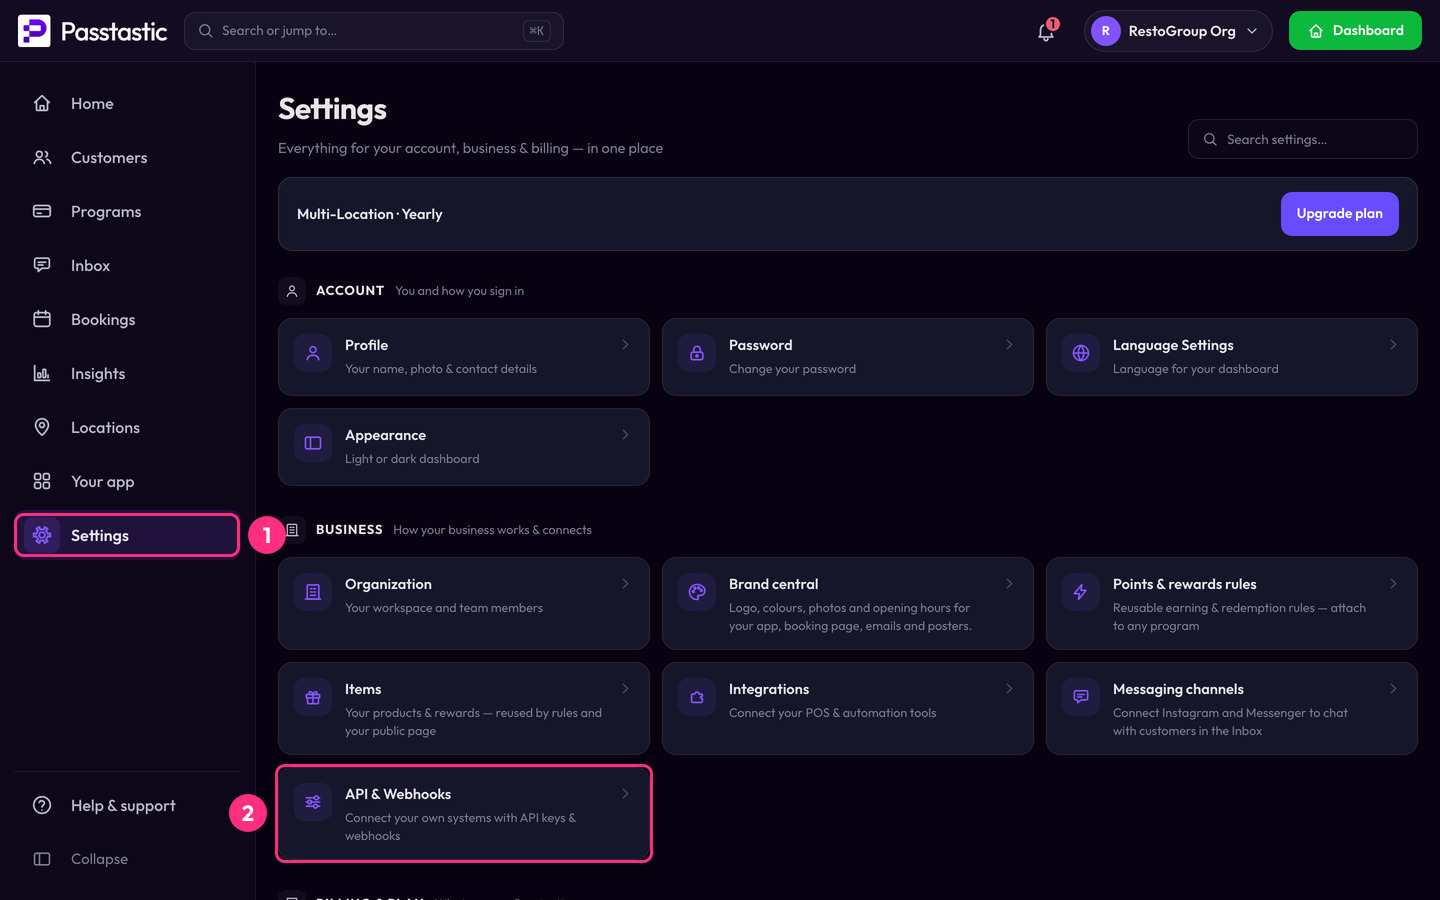
1. Open Settings, then API & Webhooks, and go to the API keys tab. Only admins can create keys. The full steps are in Using the Passtastic API.
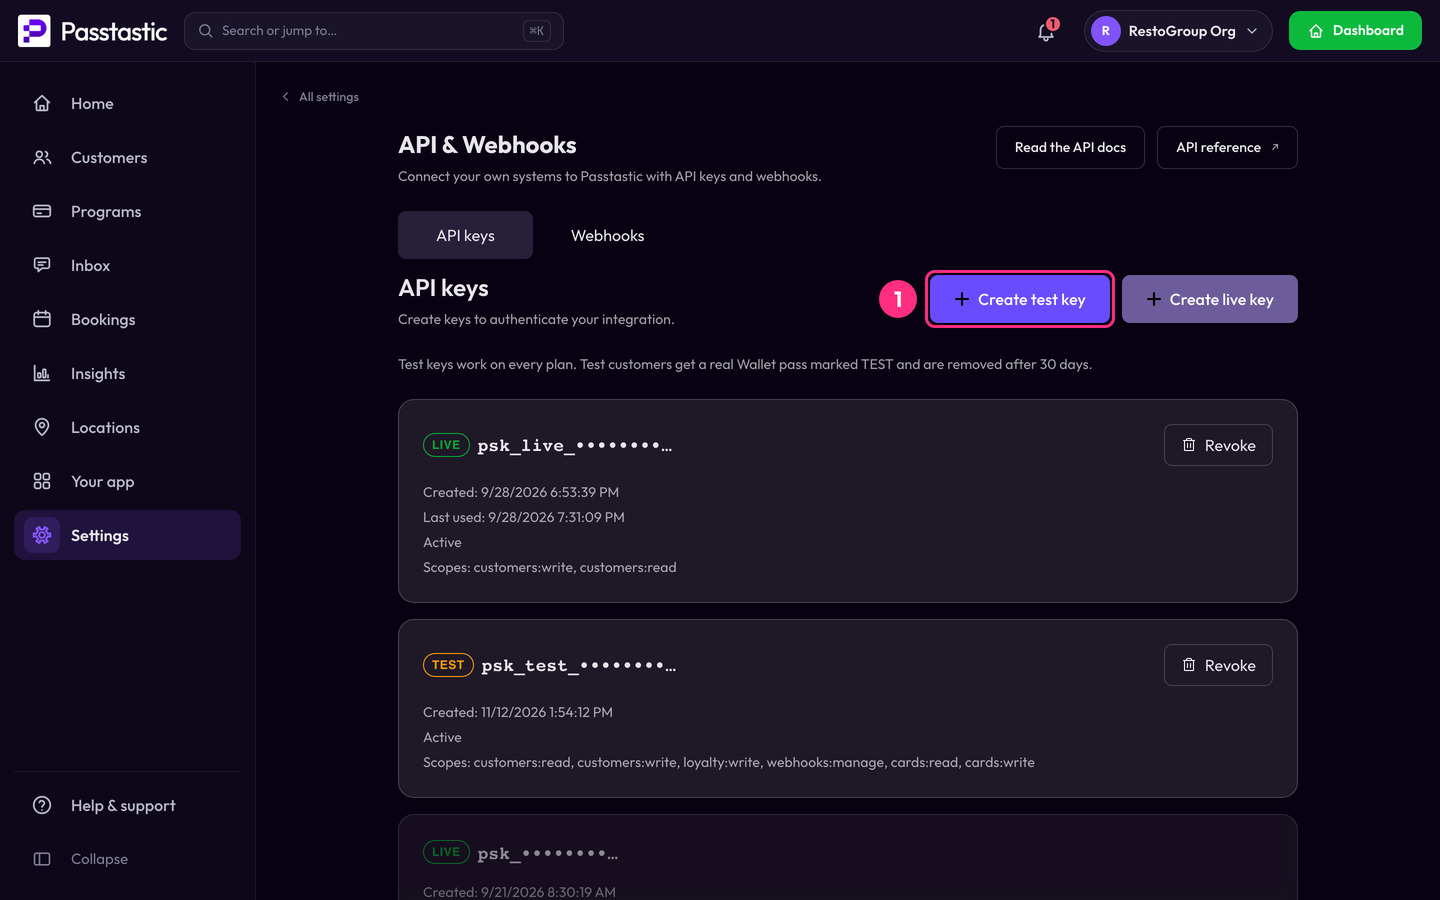
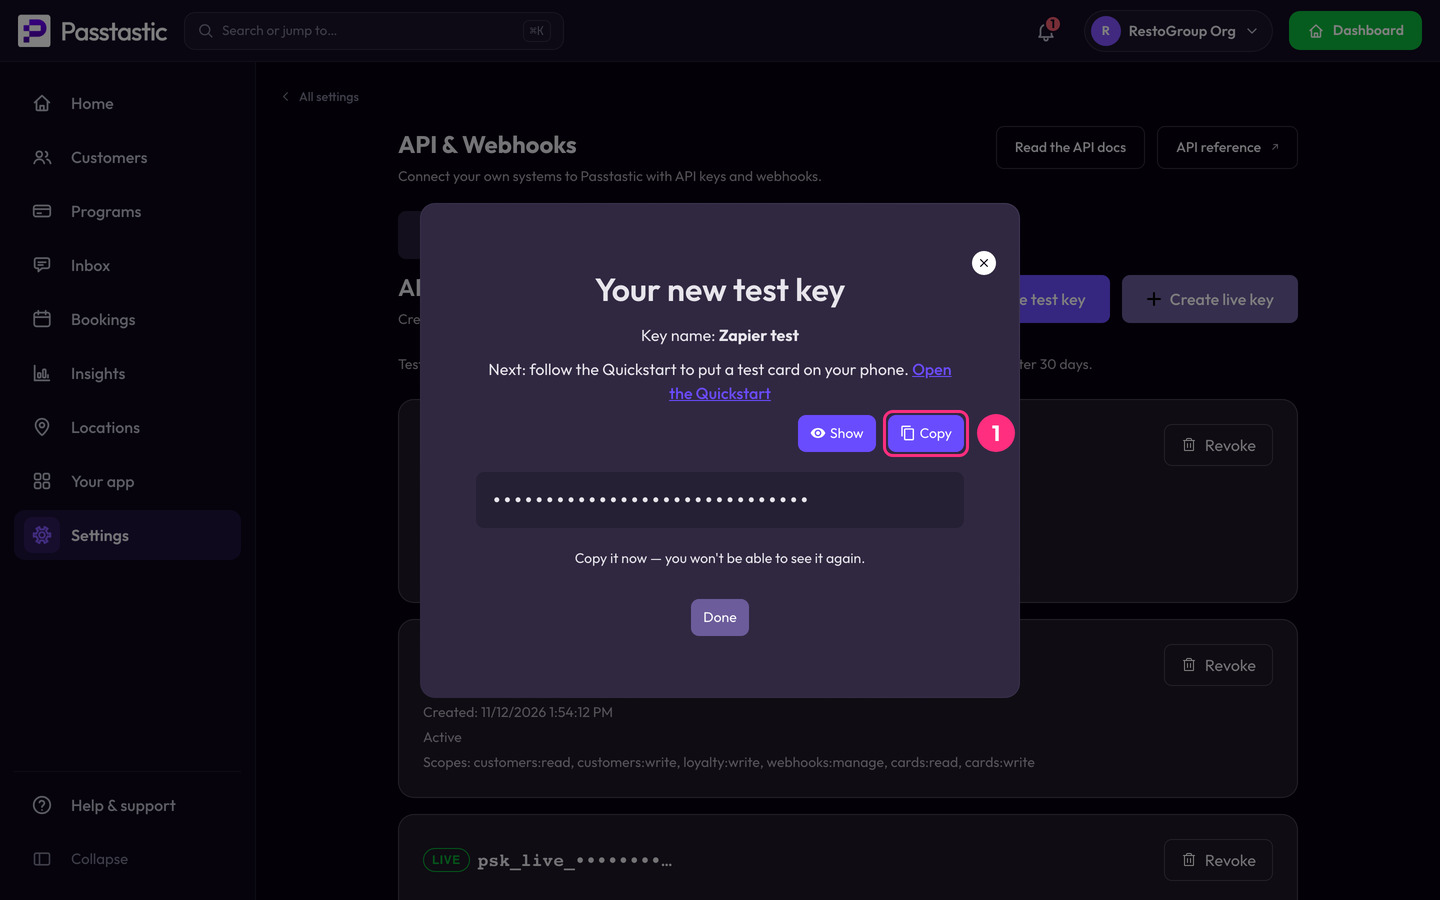
2. Click Create test key first. Give it a name such as "Zapier test", and copy it when it is shown (it is shown only once).
The key needs permission to add stamps and points and to add customers.
About the test key. A test key writes to a test copy of your program, not your real one, so stamps and points do not appear on your real customers' cards. A test order never blocks the same real order later. Build and test your Zaps with it.
Going live. When everything works, click Create live key in the same place. In Zapier, reconnect your Passtastic account with the live key. Live keys are part of the Connect your POS pack.
Step 3: Make the "record an order" Zap
This Zap has two steps.
1. In Zapier, click Create, then Zaps.
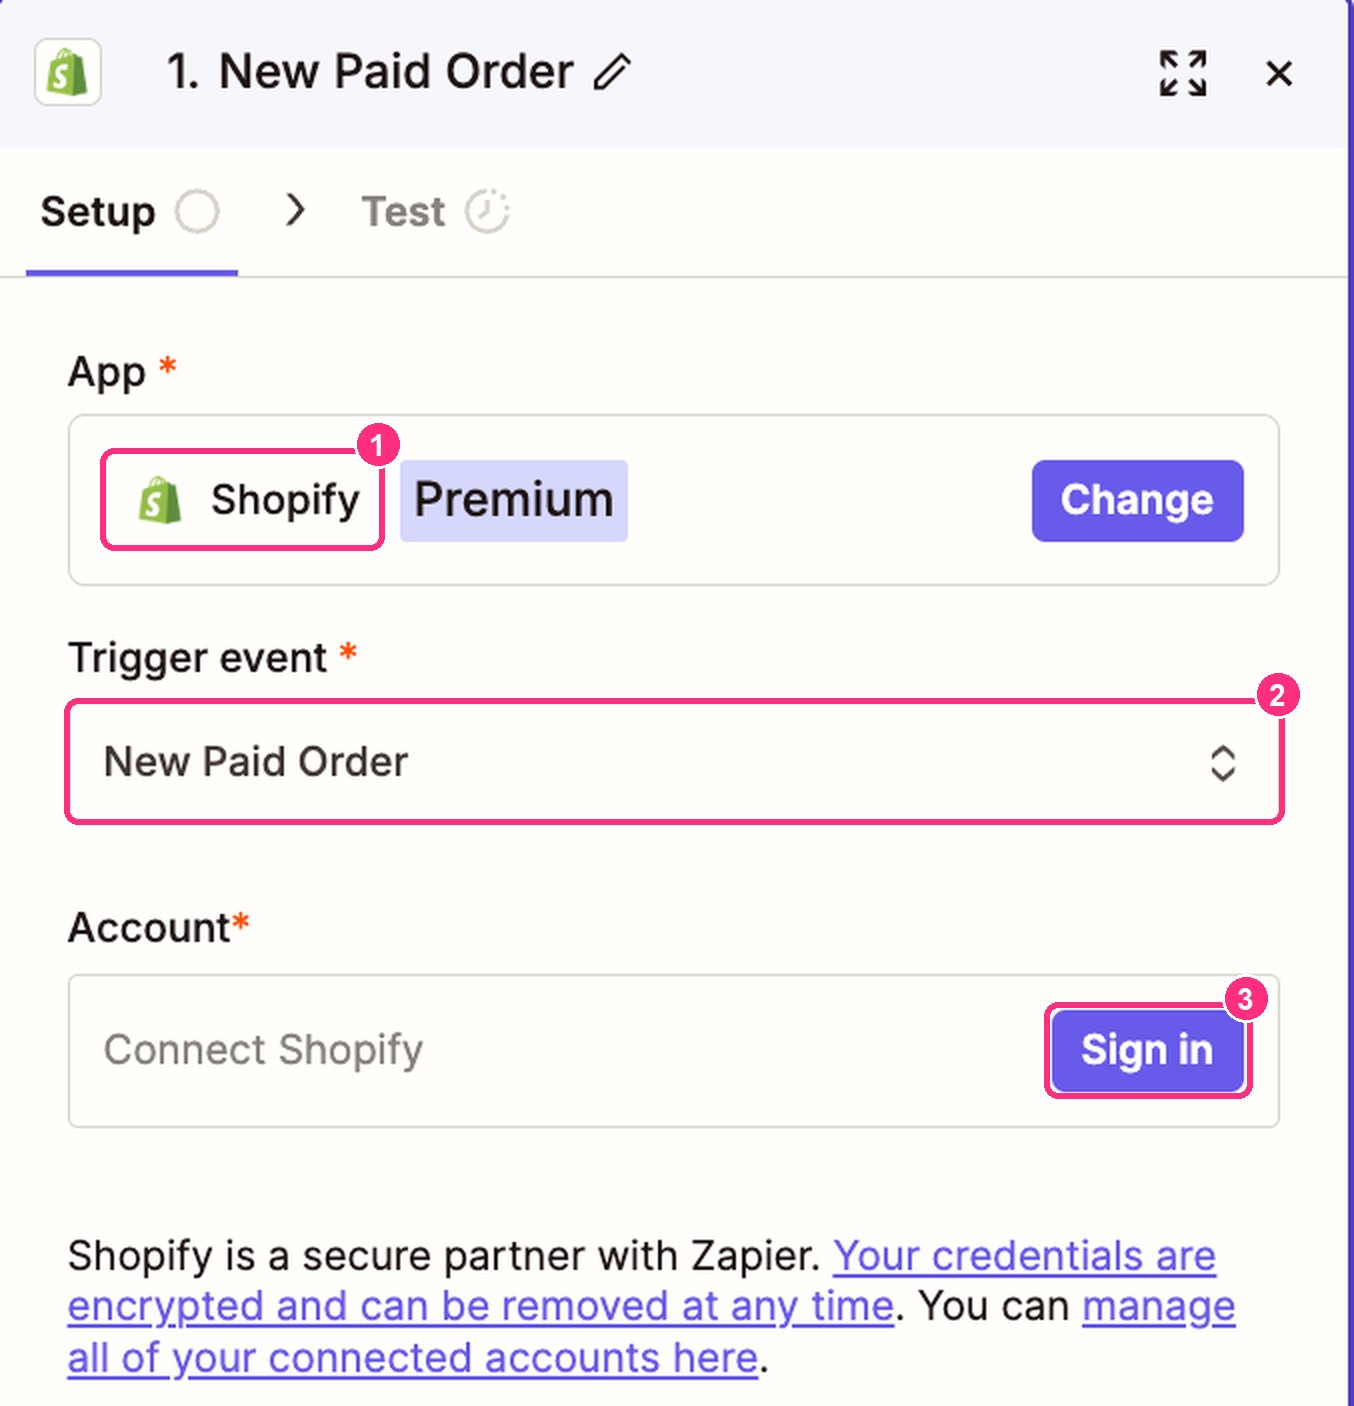
2. Trigger: choose Shopify, event New Paid Order, and connect your shop.
3. Action: choose Passtastic, event Record an order. The first time you add a Passtastic step, Zapier asks you to connect an account. Paste your API key there.
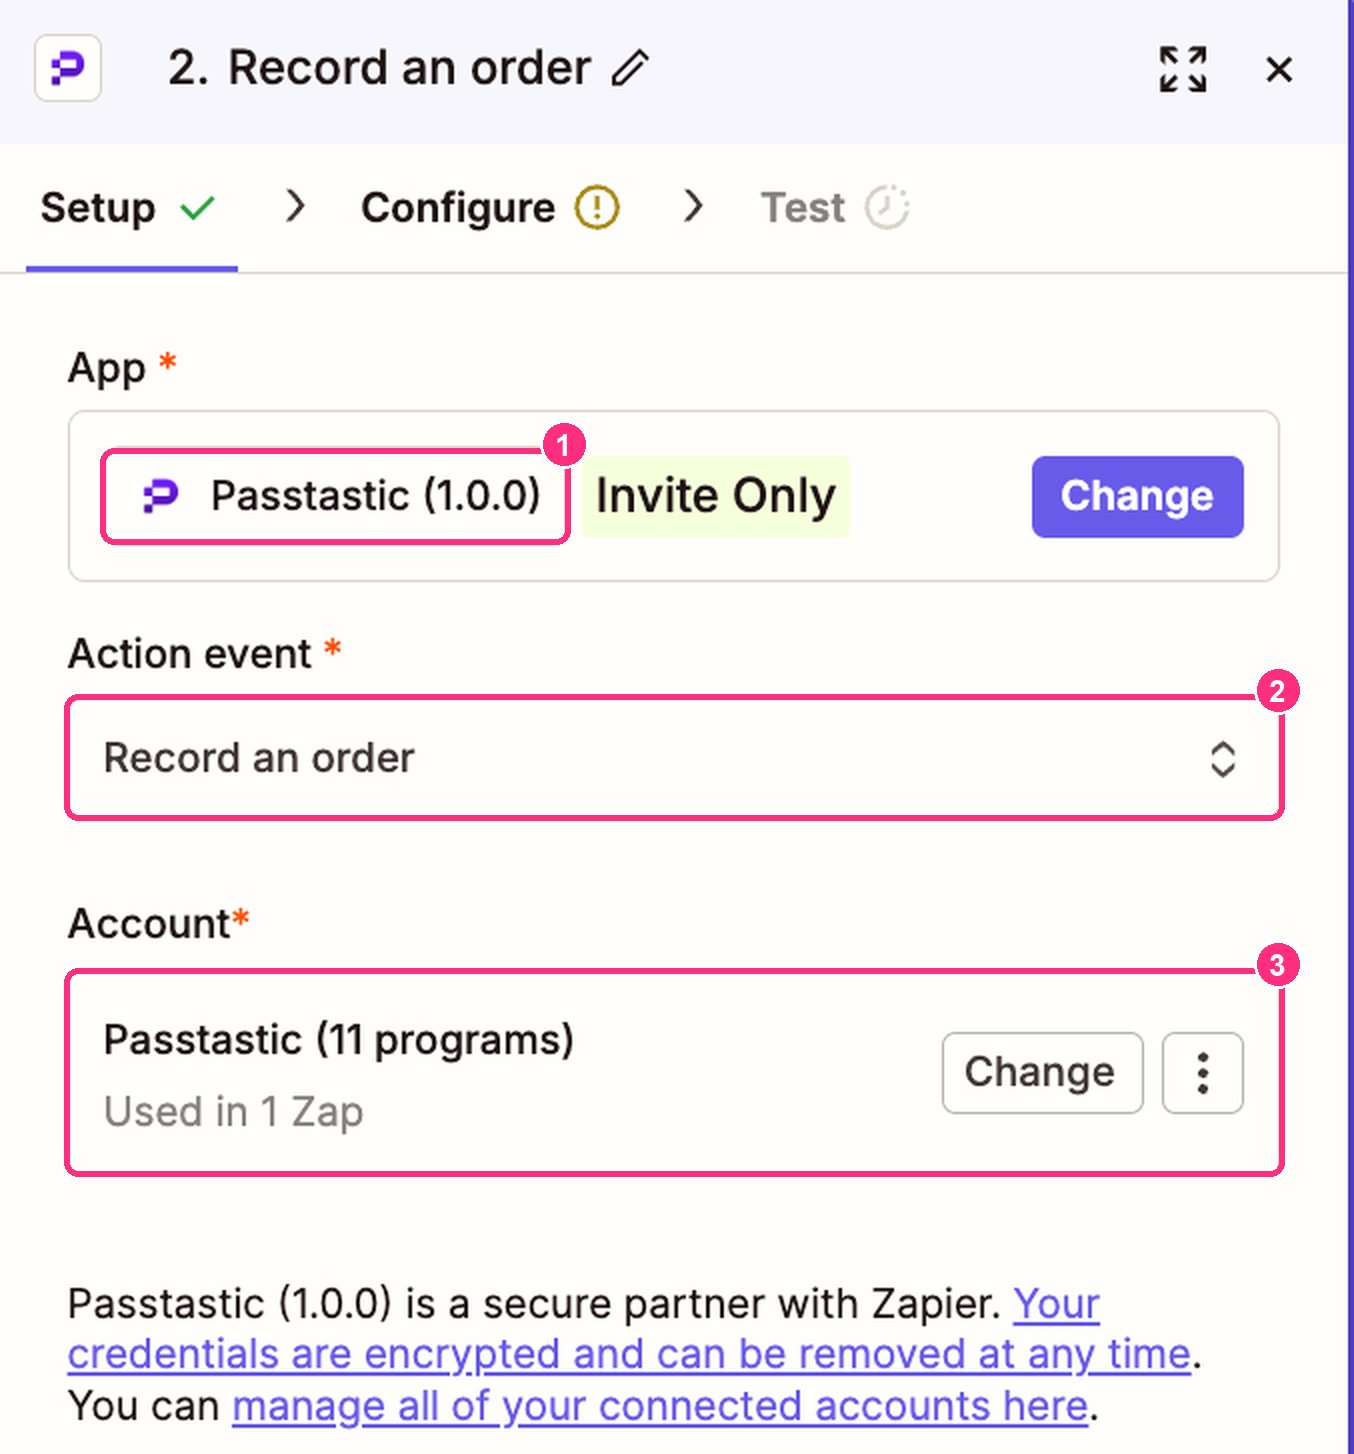
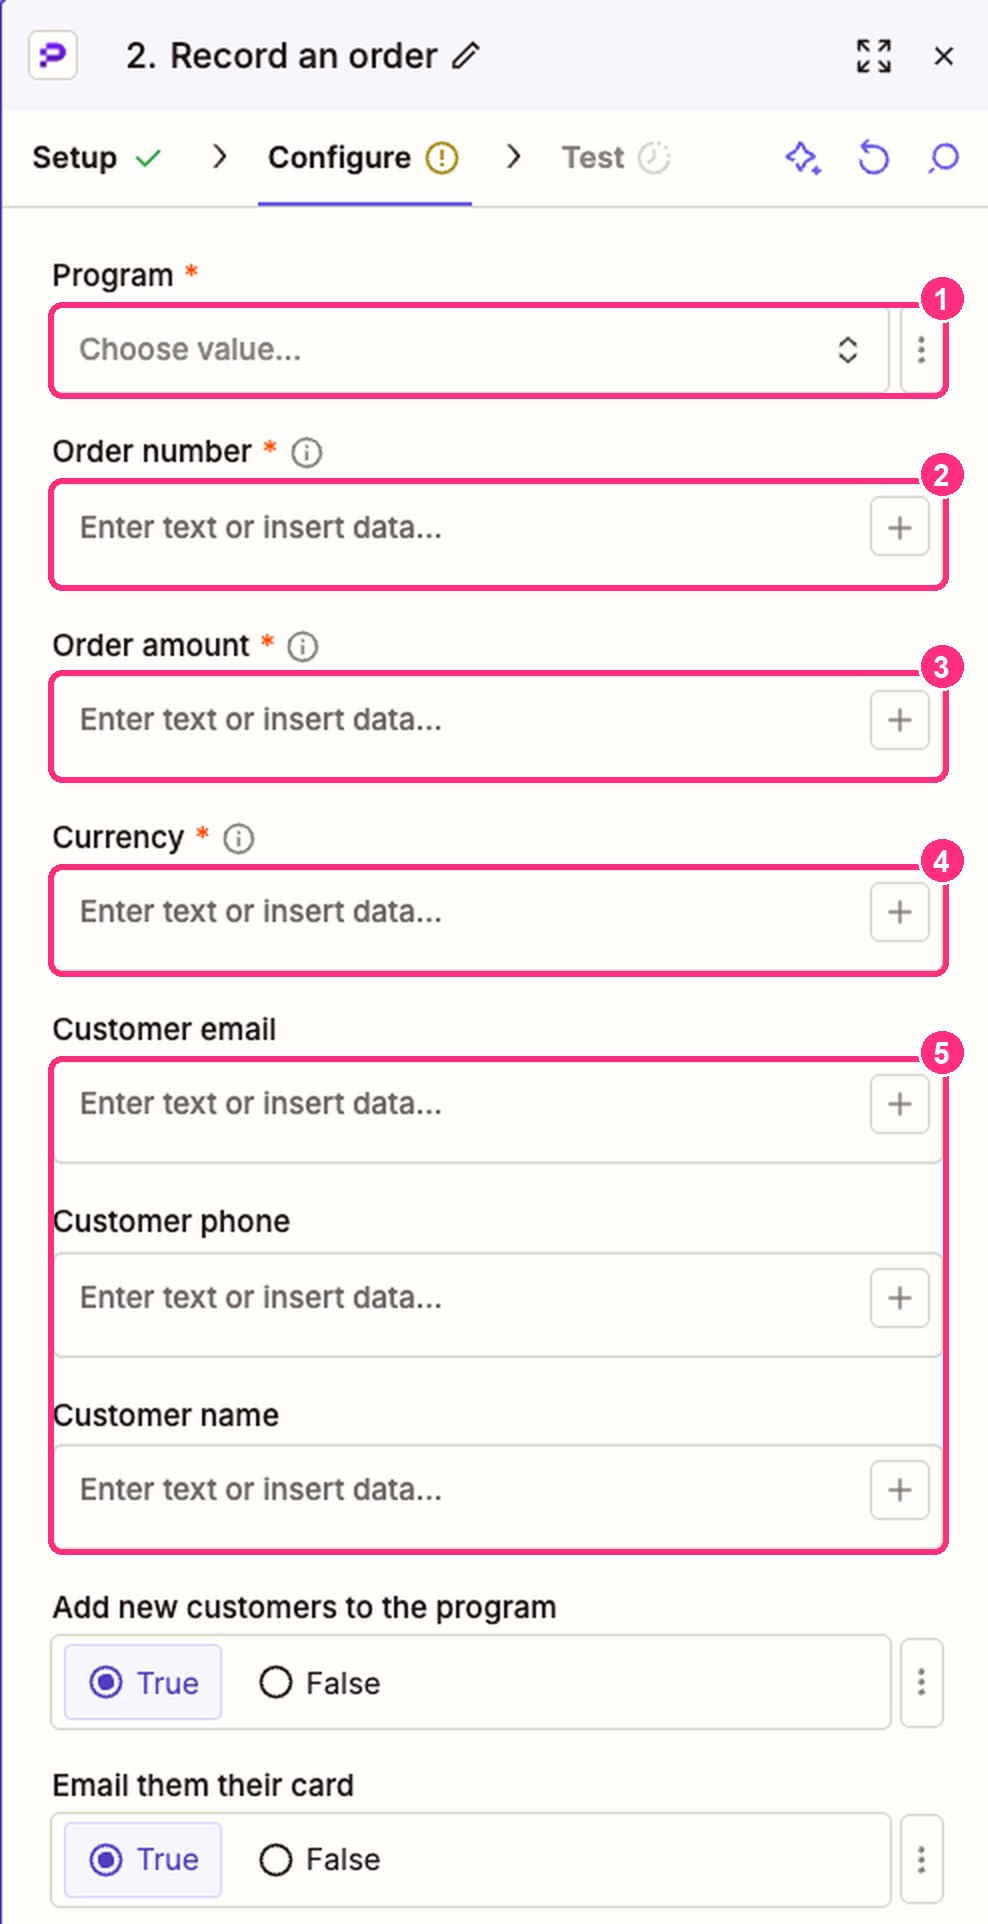
4. Fill in the fields:
- Program: your loyalty program.
- Order number: Shopify's ID field (the order's ID, not the order name like "#1001").
- Order amount: Shopify's Subtotal Price. This is the amount after discounts and before shipping, so discounts reduce what earns and shipping never earns.
- Currency: the order currency.
- Customer email, Customer phone, Customer name: from the order's customer. Passtastic recognises a returning buyer by email or phone.
- Add new customers to the program: True (the default) joins first-time buyers.
- Email them their card: True (the default) emails new buyers their card.
5. Click Test, then publish the Zap.
Step 4: Make the "record a refund" Zap
1. Create another Zap. Trigger: Shopify, event New Refund.
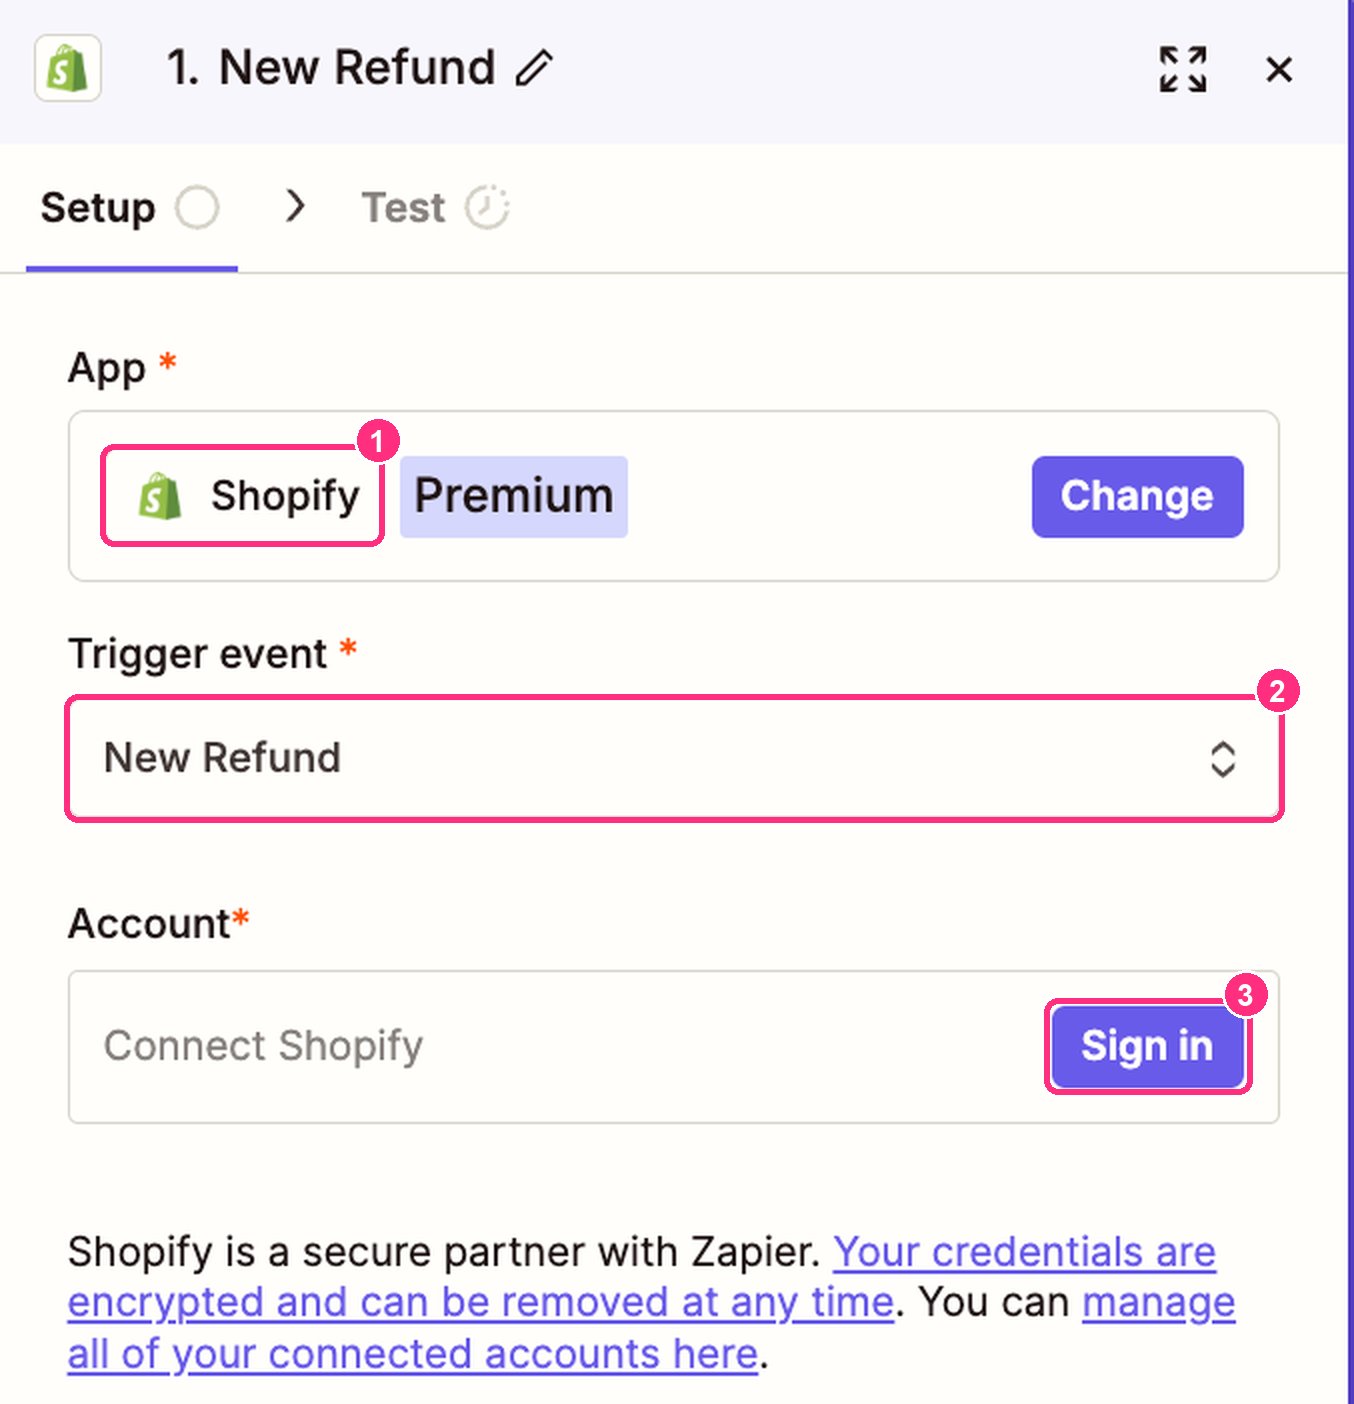
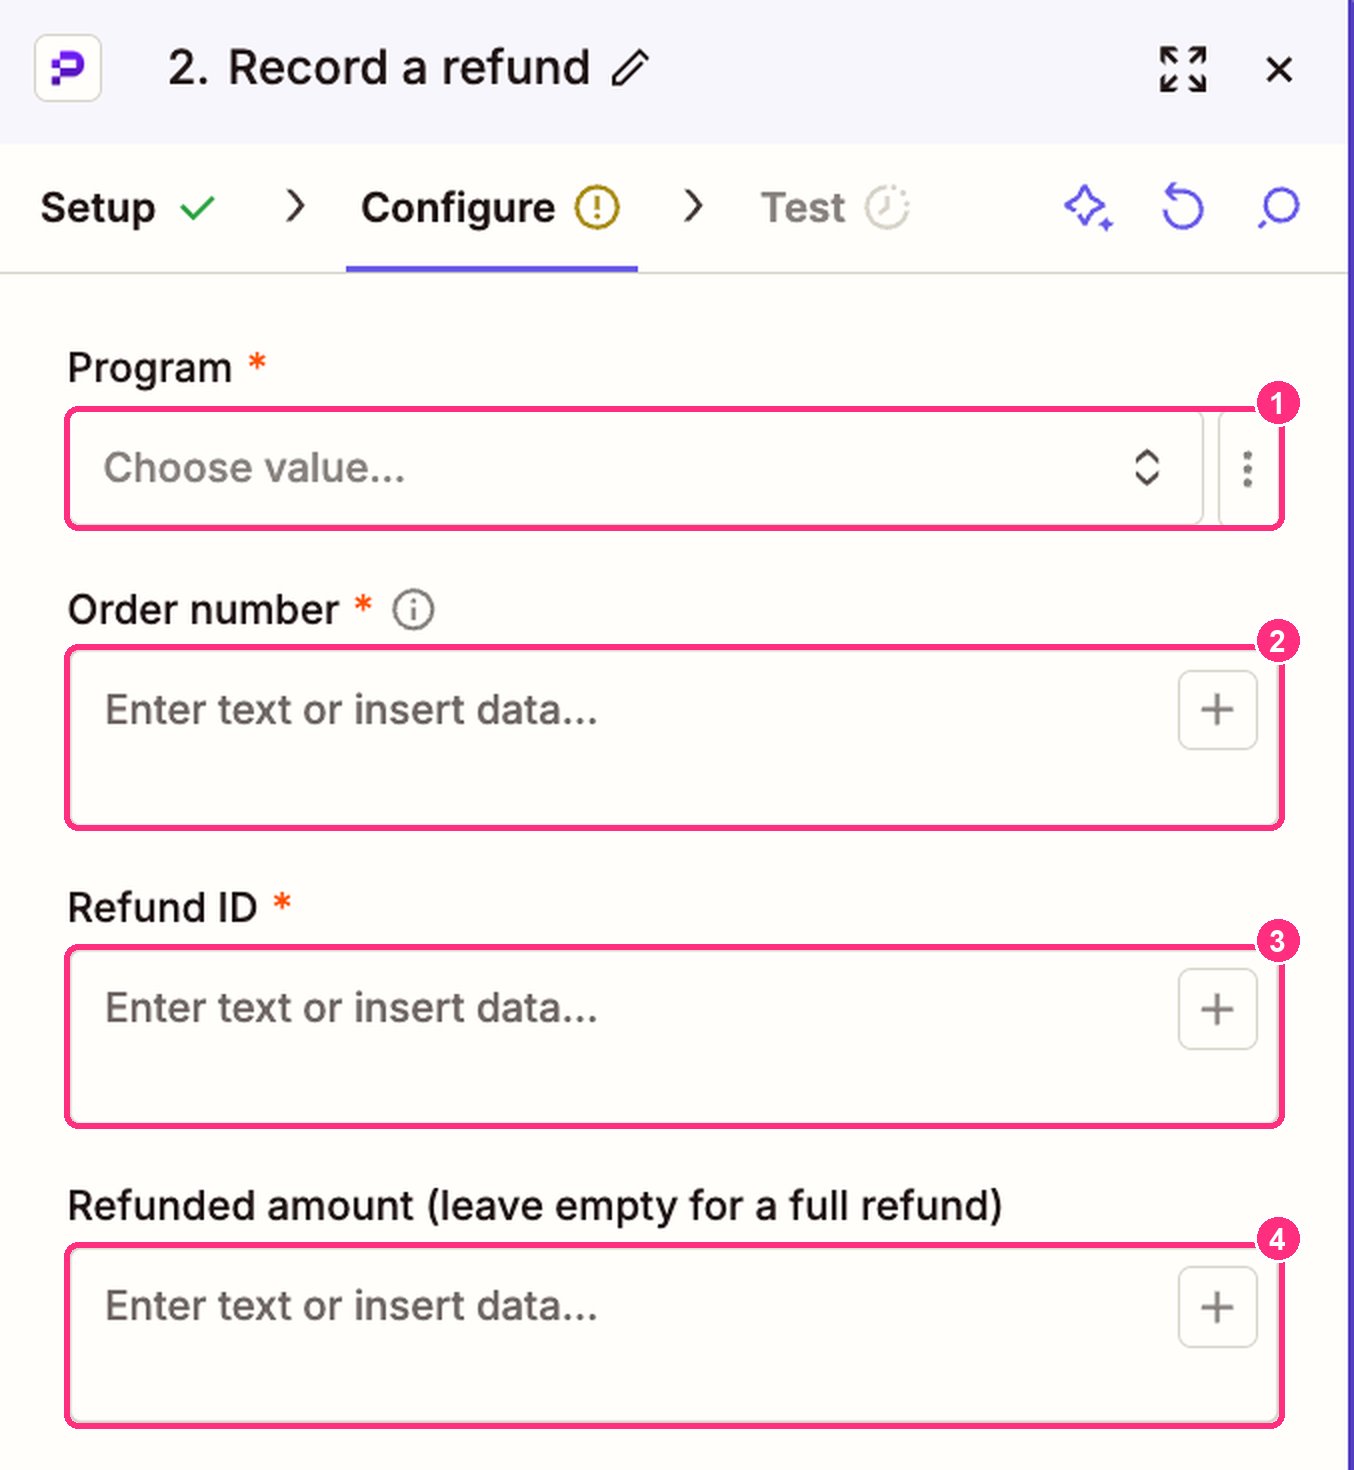
2. Action: Passtastic, event Record a refund. Fill in the fields:
- Program: the same program.
- Order number: the refund's Order ID. It is the same value as ID in the order Zap.
- Refund ID: the refund's ID.
- Refunded amount (leave empty for a full refund): the refunded amount, or leave it empty if the whole order was refunded.
3. Test it and publish the Zap.
Step 5 (optional): Add loyalty members to your Shopify customers
This Zap adds everyone who joins your loyalty program to your Shopify customers, with a tag such as "loyalty", so you can find them in Shopify and email them from there.
The Passtastic app in Zapier can't do this one, because it doesn't share contact details; the program's Zapier link does. You don't need an API key for this step.
1. In Zapier, create a new Zap. Trigger: Webhooks by Zapier, event Catch Hook. Click Continue until Zapier shows you a webhook URL, and copy it.
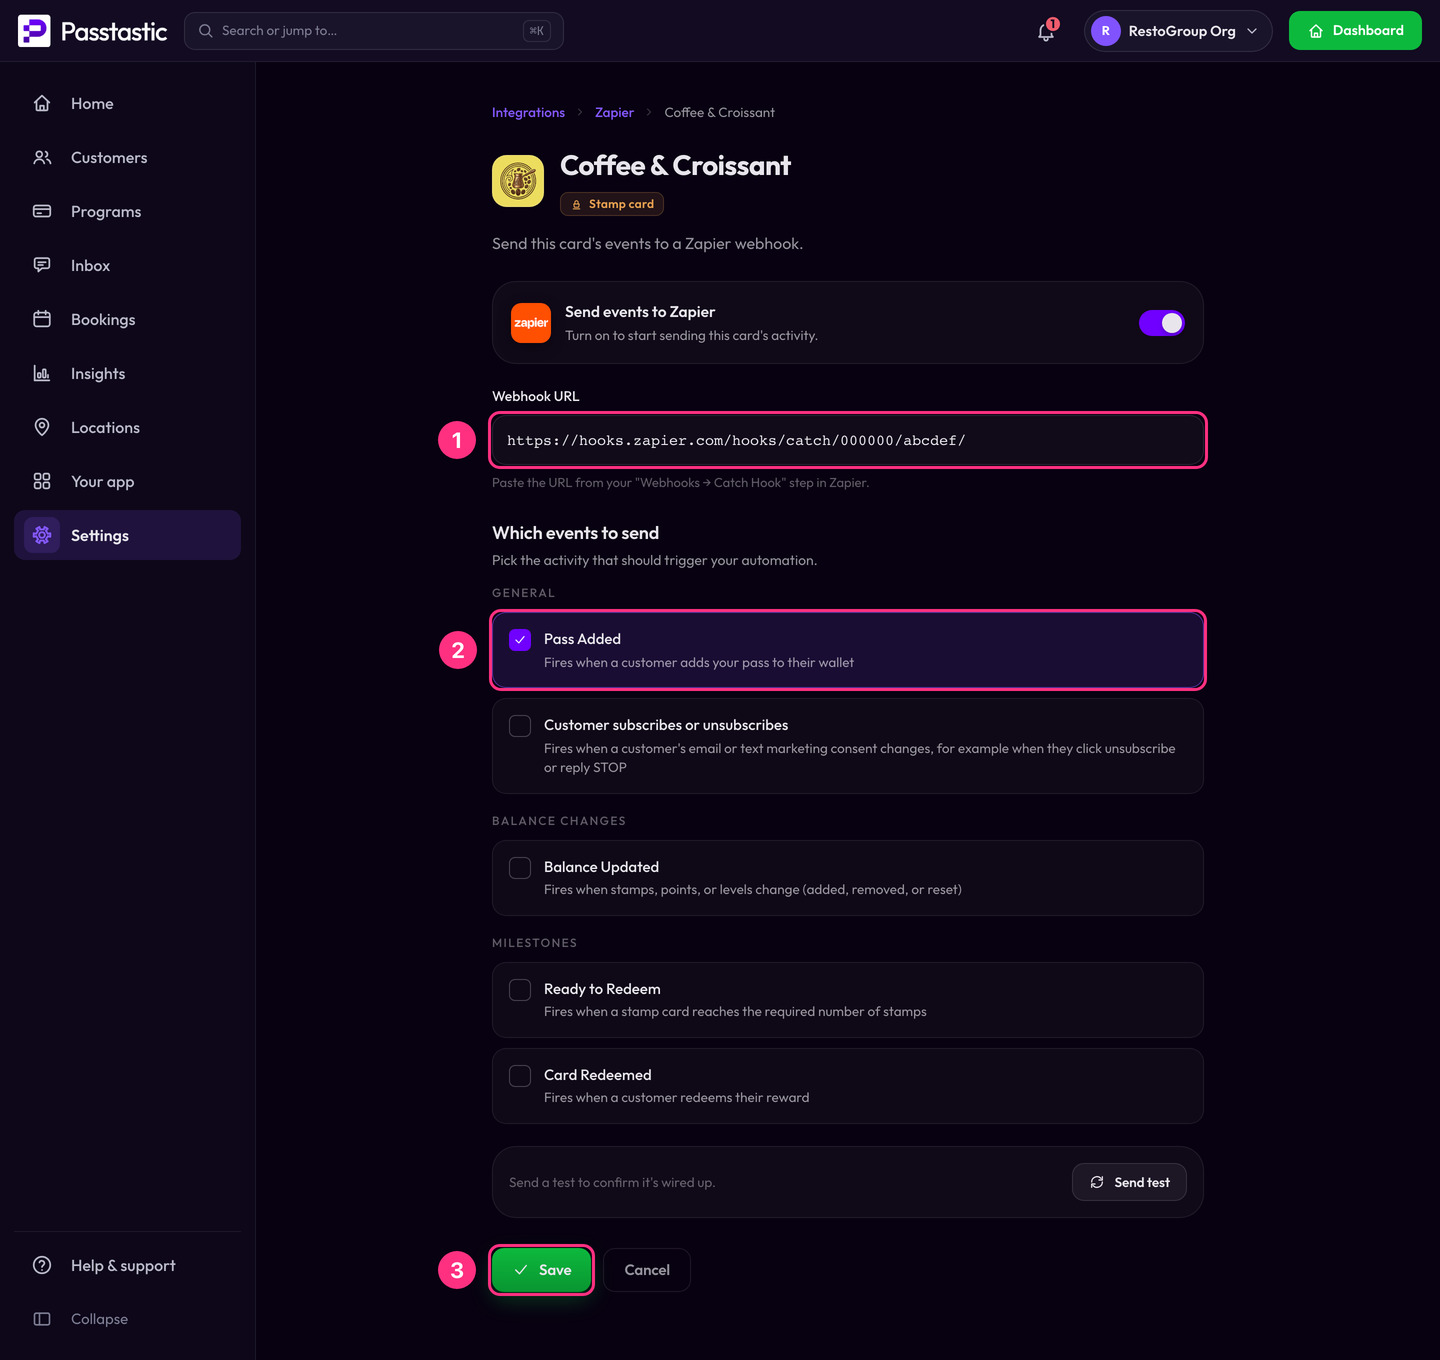
2. In Passtastic, open Settings, then Integrations (under Business). On the Zapier tile, click Set up, then pick your loyalty program. Switch on Send events to Zapier, paste the URL into Webhook URL, tick Pass Added, and click Save. Pass Added is sent each time someone adds your card to their phone. The full steps are in Connect Zapier to your loyalty card.
3. Optional, but do it if you will send marketing emails from Shopify: add a Filter by Zapier step that only continues if User Email Marketing Status (Text) Exactly matches `subscribed`. Only people who agreed to your marketing emails should get them.
4. Action: choose Shopify, event Create Customer, and connect your shop. Fill in the fields from the Passtastic event:
- Email: User Email.
- First Name: User First Name.
- Last Name: User Last Name.
- Phone: User Phone.
- Tags: a word you choose, for example `loyalty`.
- Email marketing consent: set it to subscribed only if you added the filter in sub-step 3. Otherwise leave it empty.
5. Click Test, check that the test customer appears in Shopify with your tag, then publish the Zap.
If someone is already one of your Shopify customers, Shopify does not create them a second time, and that run of the Zap shows an error. Nothing else changes.
What happens to each order
- Each order counts once. If Zapier runs the same order again, the customer is not paid twice.
- Stamp programs earn 1 stamp per order.
- Points and level programs earn points from the order amount, using the points rule on the program.
- An order of zero earns nothing.
- New buyers join your program and get their card by email. They are not signed up for offers or marketing messages.
- An expired card does not earn.
Do not loop. Never connect Stamps or points changed to Add stamps or points on the same program. Each change would trigger another change, again and again.
What happens to a refund
- Points go back in proportion to the amount refunded, and never below zero.
- A stamp is taken back only when the whole order is refunded.
- If you turned off refund deductions for the program, nothing is taken back.
Shop and online together
Scanning in the shop keeps working for shop sales. Rewards are given in the shop with the Scanner app. Online orders earn stamps and points.
Common questions
Do I have to put my customers into Passtastic myself?
What exactly does Passtastic write into my Shopify shop?
Do refunds take points back?
Can staff still scan the card?
Why was an order not recorded?
Why did a refund change nothing?
A buyer joined but got no card email. Why?
Related: Connect Zapier to your loyalty card, POS and integrations.